


A site dedicated to discussion of these classic boats
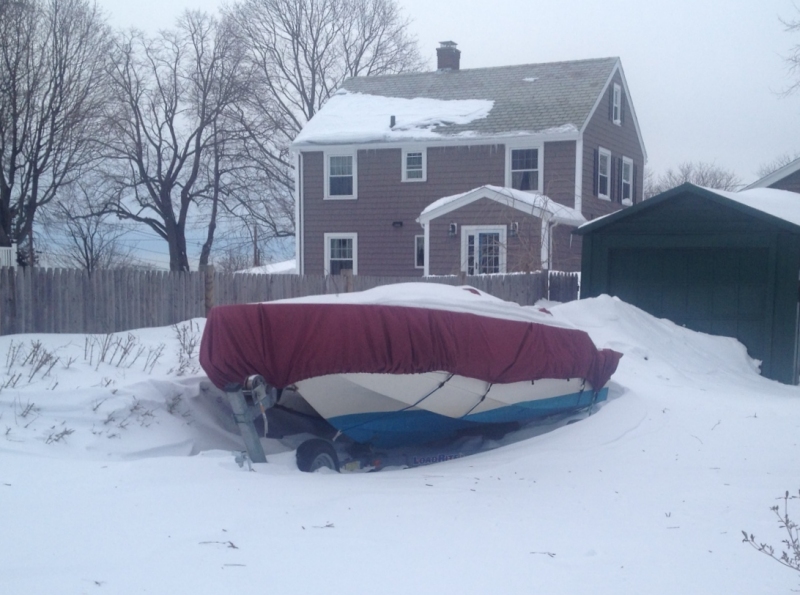 I haven’t had much opportunity to post in recent months–let alone do any work on the boat. Seatoad sits in the driveway under a mantle of snow and ice. this winter has been particularly harsh–over eight feet of snow in Boston and still a month to go until spring. A few weeks after Christmas I pulled off the cover long enough to lay a bunch of planks across the gunnels. Good thing or the snow would have collapsed the cover long ago.
This afternoon I finally got around to starting a preliminary spring to-do list for the boat. There’s a lot that needs doing.
The rest of the items are related–one way or another–to the repower I did last spring. While the new engine itself is great (a Honda 4 stroke) the work done by the service center was awful–sloppy and rushed despite taking six week. They even broke a few things on the boat in the process.
what I need to fix:
One of the projects I’d planned for this year was a deep clean, polish, and wax of the hull and deck. But it’s August and as much as I like the idea of a clean shiny boat it just doesn’t look like it’s going to happen. Not in time for this boating season anyway.
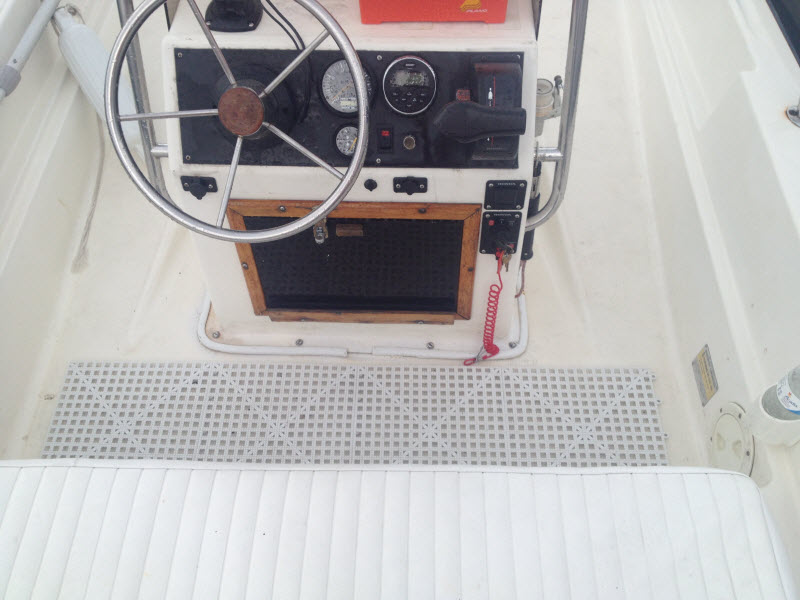
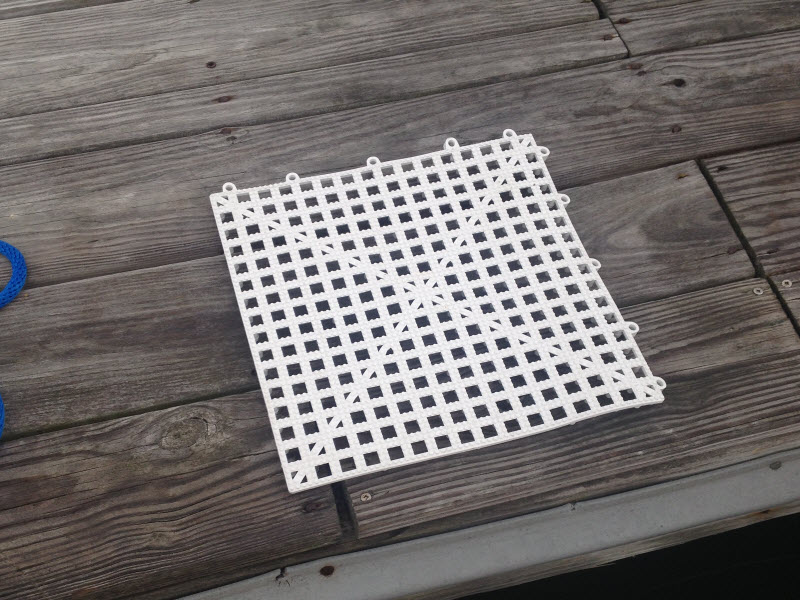
So in the interim, one thing I did to brighten and protect the deck was to add a set of deck mats. The ones i bought are called Dri-Dek and they’re manufactured in Florida by a company of the same name. They come as 12″ x 12″ interlocking panels that you assemble to fit the space you want to cover. West Marine will happily charge you six plus dollars apiece for them but you can get them direct from the manufacturer for a little over four. I found other places to buy them online as well, e few with pricing even cheaper than the manufacturer although with fewer available colors.
They’re well worth it…rugged, well made, and easy to assemble. In addition to sprucing up and protecting the deck, they also provide a no-slip surface and, as their name implies, will help keep your feet dry from water on the deck. The only caveat is that in bare feet they’re not the most comfortable surface in the world to stand on. So if you spend a lot of time in your boat in stocking feet you may want to consider other options. Aside from that, I’m very pleased.
They come in about a dozen colors including white, grey, blue, black, green, red, etc. I opted for white because part of what I wanted was to brighten up the cockpit. I was a little concerned that the white might stain easily but that hasn’t been the case.

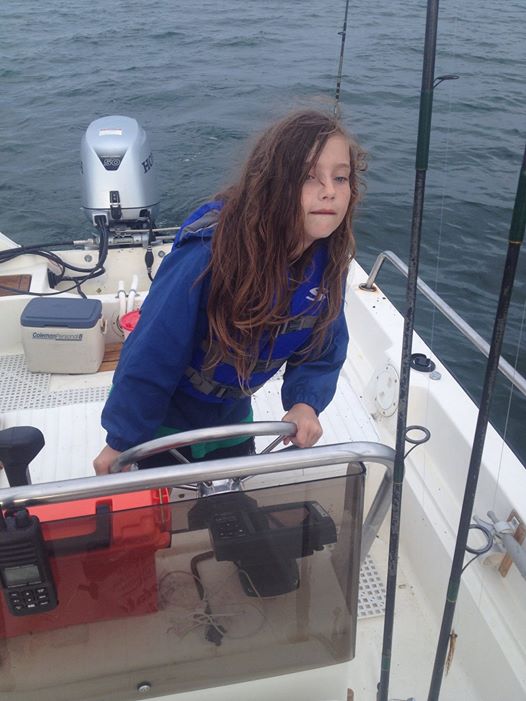
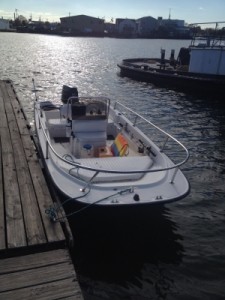
As a father, one of the things I appreciate about my Wahoo! is how kid-friendly they are. That manifests itself in a variety of ways: their stability, their unsinkability, the uncluttered cockpit that makes boarding and moving around once aboard easy. They’re simple to launch and operate.
Like their Whaler cousins, they’re also great teaching boats for kids, as demonstrated here by my eight year old, Sarah, taking her first turn at the helm.
,
 Late last season I damaged the gears in the lower unit. The how and why is for another article. But it meant that this year I had to choose between repairing the engine (a 1995 Johnson) or replacing it. I opted for replacement, figuring then I could repair the Johnson at my leisure and either sell it or keep it as a backup.
The next question was new or used? I’m slow draw when it comes to spending money but after mulling it over, I decided to repower with a new engine. It wasn’t an easy decision. New outboards are pricey. The frugal guy in me had a hard time with the idea of putting an expensive engine on a hull (1987 Striper 16.2) that’s worth a lot less.
On the other hand was this:
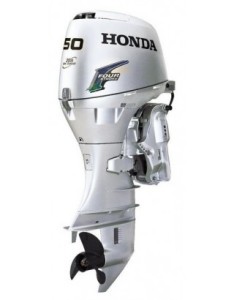
So I started researching. For size I decided to stick with the 50 hp I currently have on the boat–50 moves it plenty fast for me and I want to keep the cost and weight down. Also important to determine with any engine you buy, new or used, is who is going to service it. You need someone who is knowledgeable, affordable, and won’t string you along. Which doesn’t sound like rocket science, but can be a lot harder to find than you’d think–especially in the middle of the boating season. You need to know this BEFORE trouble strikes. (As I learned the hard way with past engines.)
I compared features of Evinrude, Honda, Mercury, Suzuki, Tohatsu, and Yamaha. All seemed reliable. In the end I narrowed the choice to Honda and Tohatsu. These offered the best combination of weight and price. Also both were available from dealers close by with good reputations for service after the sale. Both priced out about $7800. That’s for the motor, wiring harness, controls and cables, fuel/water separator, prop, and installation. (For the same money the Tohatsu also included a tach and trim gauge.) Based on proximity and reputation, I decided to go with the Honda guy.
So that’s where I’m at. Installation is scheduled for the week after next. Can’t wait but in the meantime I have bottom-painting to do. I’ll fill in more of this article as it happen. Be interested to hear any advice/experience others have learned from repowering their Wahoo!s.
P.S. Regarding Tohatsu, a lot of interesting and seemingly contradictory information about them around. I’ve read and been told that Tohatsu manufactures Nissan outboards–that Nissans are just Tohatsus with a Nissan sticker. They also make a lot of smaller Mercury and Evinrudes (this from a Mercury dealer). On the other hand, this is the first year Tohatsu 4 strokes are available over 30 hp, and the Honda guy told me that it’s Honda that’s making the new, larger 4 stroke Tohatsus. The marine engine industry is a complicated business.
 Hi folks. Yesterday it came to my attention that some people have had problems logging in or registering for the site the past couple of months. I’d been wondering why traffic seemed a little slow. I thought it was just the winter doldrums.
Sorry! The problem is fixed now.
What happened is, a few months ago I installed some software that was supposed to block spammers from accessing the site (you’d be amazed at how many spam bots try to register on a daily basis). Unfortunately, in addition to blocking spam, the software ended up blocking a number of of legit logins, both current subscribers and new visitors trying to join the site.
So as of an hour ago I’ve turned the blocker off and it will stay off while I search for a better solution. To those who had issues logging in, you shouldn’t have any going forward. (But if you do, please email me directly and I’ll get you fixed up.)
Here’s to the start of a new boating season. The cool news it that wahoo.seatoad.net now has close to 200 registered members. That’s a lot of Wahoo! owners! Looking forward to swapping info and stories with you all in months ahead.
 Finally pulled the boat today. I didn’t have any choice really. The POPYC docks are coming out Saturday and the weather is supposed to turn nasty tomorrow with rain and gusts up to 40 mph. My boat was the last one of the docks by several weeks. With the engine problems I’ve had I was worried about getting it out. The options were to put a small, spare outboard on her or try to run her at the lowest possible speed using her own engine, gears a-clattering, and hope that she’d limp into the launch without something catastrophic happening. I’d initially planned to run her to Zioli’s crude but close-by ramp but found out earlier this week that it was blocked off by wintered boats. The Lynn ramp, a mile away, exposed, and with no place to tie up, by myself without help, was out of the question. That left Tim H’s ramp a mile and a half or so up the Saugus River. It was the farthest of the three and being upriver presented an issue if I didn’t time the tides right. But it was the only option left short of a tow.
The day was nice for November, mid 50s and sunny. Wind out of the west and picking up but not too bad yet. I made it over to the slip around noon, 45 minutes before high tide. The idea of mounting the outboard as a kicker quickly proved a no-go as the transom was 2.5 inches at its narrowest point and the 8 horse I brought along wouldn’t open wider than 2.25. So that meant running upriver on the bad engine, with a chance it’d die somewhere along the way. The thought of causing serious engine damage just trying to move a boat a little over mile was not appealing. That it might also leave me victim to the wind and currents was icing on top. I didn’t like the risk but also didn’t have time to to hem and haw: the tide was near high slack and it was a BIG tide…another hour and it’d be pushing out hard to seaward, meaning I’d have to throttle up just to make headway, something I didn’t want to do given the engine problems.
So I loosed the lines and prepared to get underway. At the last moment I realized I didn’t have a life preserver aboard (I’d stripped the boat of deck gear and removed the dock box a few weeks back) so I hunted around in the club dock until I found a kid’s styrofoam boogie board. Not Coast Guard approved but in a pinch it would keep me from drowning.
Pulling out of the slip the engine showed the symptoms that made me releuctant to run it in the first place…on its own it slipped from neutral into forward, and shook and clattered. On the other hand, as it moved along, the problem didn’t get any worse. And with the tide more or less slack and no other boat traffic to contend with we passed under the General Edwards Bridge easily. The half mile to the MBTA railroad bridge was uneventful. Approaching the bridge I eyed the clearance. The eleven foot tide left me five and a half feet. Not much, but enough for my small boat.
The next and last obstacle was the 107/Western Ave Bridge another half mile ahead. This bridge had even less clearance–three feet it looked like as I approached. There’s a drawbridge there but this time of year on a weekday I wasn’t sure it’d be manned. And anyway I hadn’t brought a radio along. If the clearance was insufficient to let me pass I’d have to wait for the tide to drop. And of course with the dropping tide would be the surging current I didn’t want to fight.
As it was I made it under with about a foot to spare, my head ducked low, looking up at the iron i-beams that even at low speed could likely cave in a skull. Five minutes later I was tied up at the dock. Another boating season over.
Next year, swear to God, one way or another I’m done with problem engines.
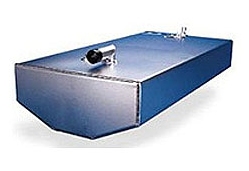 Here’s some great info on where to get OEM replacement fuel tanks for Wahoo!s, passed along by site subscriber Dan Rhodes. Thanks Dan!
“I have a 1988 18.50 Offshore. I just got off the phone with RDS fabricators in Perry Florida and ordered my new 45 gallon aluminum tank! RDS is the same company who made the original tanks, formally AFP, Aluminum Fabricated Products. The tank I ordered is the exact spec tank for my model, down to the location of the fill inlet, vent tube, fuel gauge, and fuel suction. The model # for those of you who cannot read your original labels is 317-45A-AF.”
RDS’s web site is www.rdsaluminum.com
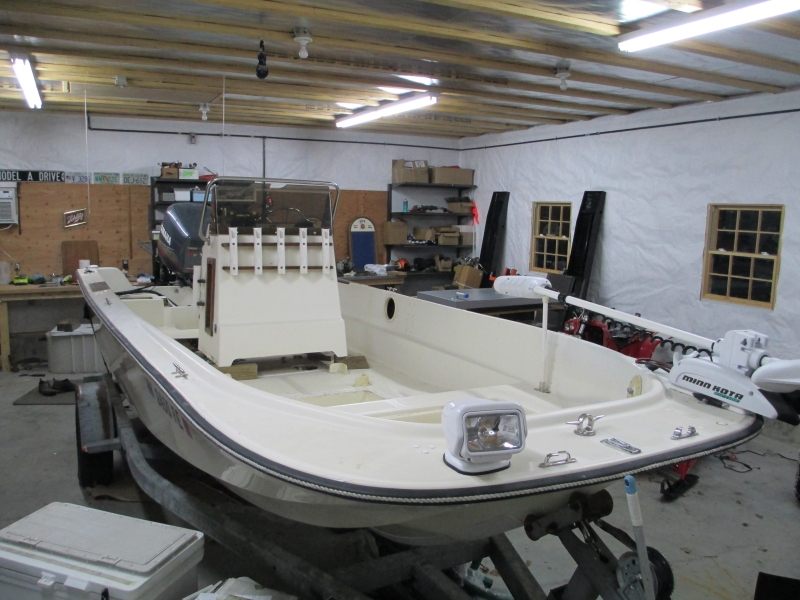 Wahoo! owner Tom Brennan recently discovered a leak in the fuel tank of his 1989 Wahoo! 1850 Offshore. He’s in the process of replacing it and graciously offered to share his experience. Fuel tank leaks are a common issue in the Offshores, due to their below-deck location and the lack of below-deck air circulation.
So here it is, with lots of great info. Thanks Tom!
(Note: As of this writing (3/17/13), Tom wasn’t completely done with the project (e.g., he hadn’t replaced the deck), so it’s possible this article will get updated with new info.)
Also, for more below-deck and cutaway shots of an 1850, see these great restoration project photos by Joe Bernard.
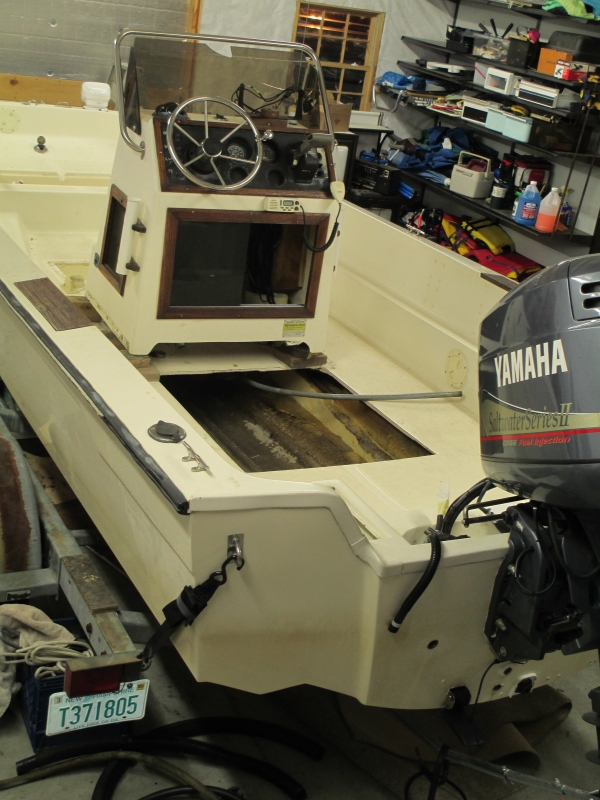
I live in southern New Hampshire. Prior to owning my Wahoo I had a 14 foot Mckee Craft (Whaler style) that I fished hard. But with three boys and big dreams, I needed a bigger boat. I happened to see an 18 foot Wahoo! Offshore. It was a mess but I knew the design would be perfect for me. So for over two months I hunted Craig’s List from Maine to Florida. Eventually I found a boat in West Virginia that looked promising, selling for just under six thousand dollars. I traveled solo non-stop to see it in person. It was in awesome shape, with a 2001 Yamaha Saltwater Series 150 that ran like new. The title identified it as a 1989 but contained no other information of note. I had it home by Sunday.
Not long after acquiring it I took it for a two week fishing trip on the Ottowa River in Canada. I ran it hard every day with no issues. Great trip–180 fish, 12 species. Wow (i reeled in 3). Returning home, I next took it out in Portsmouth Harbor where we banged around the ocean all day. Back home that evening as I was cleaning up my wife smelled gas. I opened the access ports and the smell was very strong. I knew right then I had a leak. I wouldn’t be taking my kids out in the boat until it was fixed. The tank had to come out.
Now when I bought the Wahoo! I knew it would need a new fuel tank eventually. I’ve changed tanks in a 33 Egg Harbor from that experience know that the constant to moisture over many years will eventually rot pin holes in aluminum (crevice corrosion). However, the way I replaced tanks in the Egg (the right way) is impossible in a Wahoo!.
To replace the tank meant cutting it out of the deck. And the challenge there was figuring out the dimensions of the tank and where to cut. Before doing any cutting, of course, I got every last drop of gas out of the tank. I did not want to remove the whole center console, so I lifted and blocked it as high as the cables/wires would allow.
 The final cut  Another view |
Measuring through the access holes I was able to determine that the tank was 29 inches wide and the drain lines on the floor of the boat centered at 30 1/2 inches. So my first cut would be for width. I laid down tape on the deck and drew my cut lines on the tape. I decided to make the rear width cut first. I wanted it to be as far back as possible, about an inch short of the stringer. (I wanted it an inch shy of the stringer because I planned to later build a two inch ledge for the floor piece to sit back on.)
For the front width cut, I wanted to go as far forward as I could without cutting under the center console. That turned out to be 36 inches from my rear cut. So the dimensions of the opening would be 30.5 by 36 inches.
I made one plunge cut with a vibrating saw and did the rest of the cutting with a jigsaw. The cut didn’t need to be perfectly straight. I’d hoped that 36 inches would be a long enough hole to allow me to pull tank out. Unfortunately, it wasn’t. In the end I had to cut a section off the back of the tank to get it to come out. To put in the new tank, I’d either have to cut out more of the deck or go with a shorter tank.
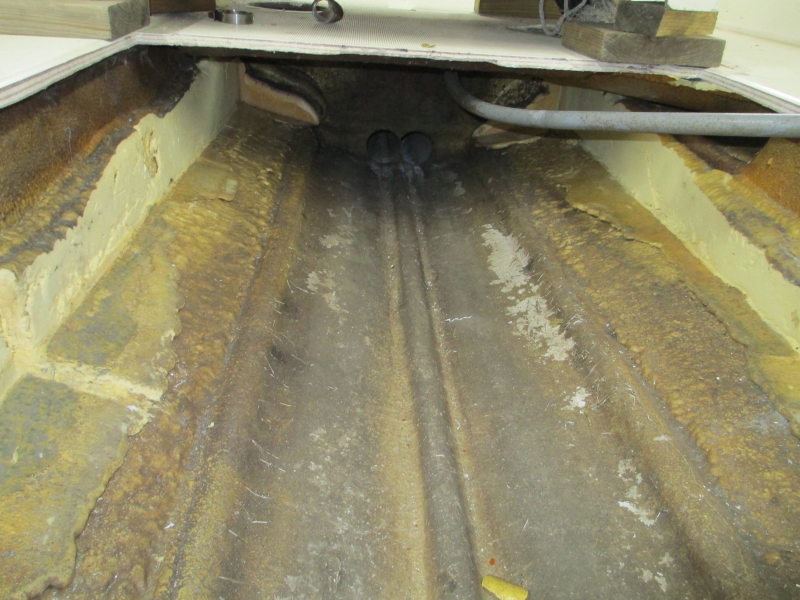 The fuel tank cavity: forward view  Rearward view |
After removing the tank I inspected it but could not find a leak. In fact, 99% of the tank looked in great shape. So I took it to a local metal shop. At first the repairman there couldn’t find one either but on closer inspection he said, “There it is,” and pointed to a light white ring of haze, rough in the middle., towards the front on the port side.
Later when I got home I looked at the tank cavity and found a dip in the foam that had trapped moisture (possibly from normal condensation) against the tank. Lack of air circulation below deck would have made it difficult for this moisture to dry out. The leak was high enough in the tank that it wasn’t until I took the boat on the ocean that wave action sloshed the gas high enough to reach it. Considering the way the tank is laid in the belly of these boats, foamed all the way down each side and corner, I’d guess such leaks are common over time.
The old tank was 45 gallons but I was willing to live with less.I preferred that to cutting more deck. So I had a new one made a bit shorter and shallower (its capacity is 36 gallons). I kept the width of the new tank 29 inches so it would fit between the stringers. I sanded down the foam on the sides and dry fit it in. It fit by a hair. So I sanded more to create some breathing room on the sides.Prior to installing the new tank I sanded, chemical etched, and painted it with four coats of Rust Bullet Industrial Coating. I plan on locking it in place with rows of 3M 5200.
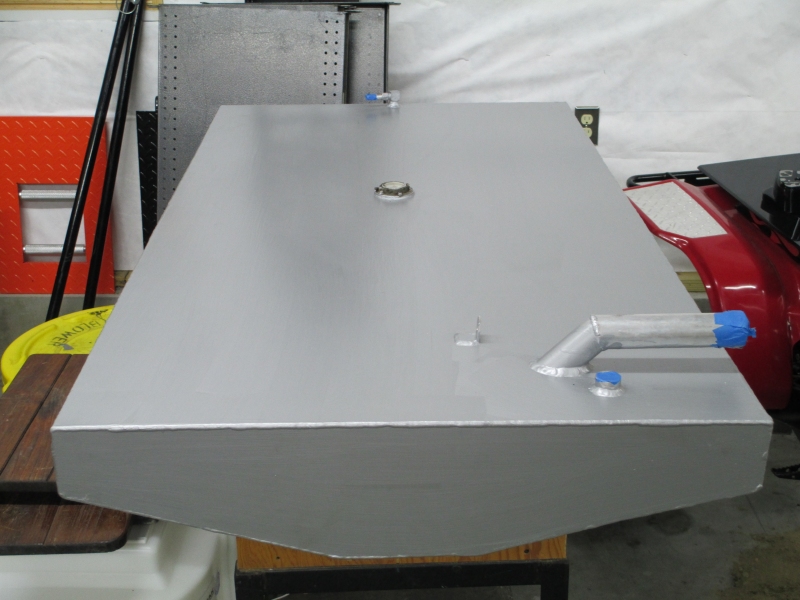
The new tank
To support the deck piece, I plan on building a two inch ledge of mahogany/aluminum plate on all four sides for it to sit on. Then I’ll attach it with countersunk screws and cover the screws and seam with 5200.
findre August 9, 2015
findre August 9, 2015
findre August 9, 2015
Lcolon7 June 23, 2015
MikeQ June 24, 2015