


A site dedicated to discussion of these classic boats
 Thanks to subscriber Tom M., the Downloads page now includes three full-page magazine reviews of the Wahoo! 1900 and 2100. Full of juicy specs, test results, comments on construction and performance. Really interesting reading, even if you don’t own those exact models. Thanks Tom! BTW, Tom says he has more that he’ll try to send along so check back.
Also…and how cool is this…I got an email from a friend of Ray Curry, founder of Wahoo! Ray got wind that there’s a Wahoo! owners group and while he’s not into the Internet himself, he’s offered to answer question through his friend via email. So stay tuned.
 End of the season up here in Boston and I pulled my Wahoo! from the water yesterday. Although I would have hauled out anyway due to the lateness of the season, if I needed any other reason Hurricane Sandy, currently just south of Cuba’s southeast tip, looks like it will give the US East coast its first (and likely only) tropical storm of the year early next week.
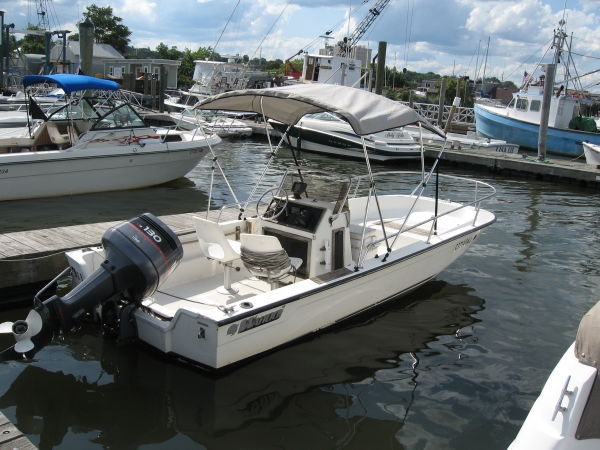
2012 was my third year as a Wahoo! owner and the best so far. Lots of quality time on the water. Many problems solved, but still no shortage of tweaks I’d like to make to the boat next year. Thanks to the many Wahoo! owners who contribute to and read this blog. It’s been a lot of fun sharing experiences and learning from you guys. Boston Harbor, when the wind and chop are up, can be a pretty rough ride. So three years in I still feel like I’m getting to know this my 16.2’s capabilities, especially in big water. Once thing I know for sure though, when she planes on a flat surface, what an amazing ride! Like a magic carpet.
This past week my friend Gary C. of Philadelphia was here. Every year in the fall Gary comes up for a short week and we go striper fishing. This year winds gusting to 30 mph kept us off the water much of the time but we managed to have a few nice days and my son Ben (pictured) took his first stripers from my Wahoo!
Now the boat’s in the driveway. Time to get busy winterizing before the cold sets in.
 While this isn’t a fishing site by any means, I couldn’t let 2012 go by without a single fishing note, especially when I set a personal best in my Wahoo! 🙂
Headed out in my Wahoo! this afternoon after work for an hour’s fishing. I was crossing the edge of a large salt water flat when I saw a few small fish (snapper blues, maybe) slashing at bait on the surface. I cut the engine, climbed up in the bow with my fly rod, and started tossing a Gartside Gurgler. As I worked it, about every minute or so something much bigger than the snappers would surge through the bait, scattering it. So I started working the fly with a little more pop and on about the dozenth cast hooked into a good fish. Fifteen minutes later, after a fight that took me well into my backing, I landed the biggest striper I’ve taken on a fly, just shy of 40 inches.
After a few pics and some time to revive her back in the water she went, hopefully next Spring to make a mess o’ baby bass.
 Last year I replaced the ancient 1981 Evinrude 50 that came with my Wahoo! 16.2 with a more powerful and reliable 1995 3 cylinder Johnson 50. After the Evinrude, which was hard to start and tended to stall in idle, it was nice to have an engine that started first or second turn of the key every time. But even with the newer engine I still wasn’t happy with how long it took to get my Wahoo! up on a plane. It took too much throttle to get the nose down. And then once it did come down often the boat was going too fast for conditions (lotsa rocks in Boston Harbor).
So I wanted to be able to plane more quickly, with less throttle, and at lower speeds. And I wanted to do it without having to increase horsepower. Following the recommendation of a friend, this spring I looked into adding a hydrofoil to the engine. Researching online I found plenty of back and forth on message boards about the relative merits of hydrofoils.
The cons:
The pros:
And the qualified statements:
Shopping around I found quite a few makes/models to choose from, with prices ranging from $40 to $150. While most hydrofoils require drilling holes in the engine’s cavitation plate (so you can bolt it on), a few of the more expensive models advertised themselves as clamp on/no drilling required. That had some appeal until I read the customer reviews which were generally not favorable.
In the end I opted for Doel-fins, one of the earliest, simplest, and most affordable outboard hydrofoils. I didn’t even have to pay the $40 they cost since I was able to scavenge a set off a boat that that had washed ashore on a local beach and was abandoned by its owner. Installation was easy. It took less than half an hour and drilling holes in the cavitation plates was not the big deal I feared it might be.
Three months of boating later and the verdict is in: What a difference!!! I don’t have exact numbers but I would guess that with the Doel-fins my Wahoo! now achieves a plane at 40% less throttle than it took before. And it now planes at speeds as low as 10-12 mph. The ride and handling are smoother, with nice easy turns and a big reduction in porpoising. And my guess (though I don’t know for sure) is that with the faster planing I’m saving quite a bit of gas.
All in all, couldn’t be happier. 😀
 The question has come up more than once: “How do I choose the right size Bimini top for my Wahoo!?”
Well, it happens that iboats.net has a great online Bimini selection wizard that’ll guide you to the right size for your model, year, and trim line. Even if you choose to buy your Bimini somewhere else, it will at least give you the correct specs. You’ll find the wizard here.
One note: Different Wahoo!s came with different railing configurations. I’d bet my bippy that the Bimini selection wizard on iboats.net does not factor in your railing–likely it assumes there are no impediments as to where you can situate the Bimini’s mounting brackets. So make sure you measure and account for the presence of your railing when choosing a Bimini.
 These are notes to myself mostly and may be of little interest to visitors of the site. But then again you never know…
Finally got the boat in the water July 6, just in time for the Blessing of the Fleet the next day. The Blessing went great, a fun party with kids playing on the beach while the grownups downed barbeque and beer. Later in the evening there was a DJ doing 60s-friendly music and there was dancing on the docks. Only hitch was that the priest never showed up. So the 2012 Point of Pines Yacht Club is for the moment an unblessed fleet.
As with 2011 I was disappointed how at long it took me to get the boat in the water. But I did get a lot of work done including new bottom paint, a new fuel fill and hose, a number of patches to the fiberglass, raising the floors of the storage compartments, sorting through the wiring in the console, adding doel fins to the engine, relocating the fishfinder transducer, painting the console dashboard, painting the engine, repairing a broken section of the wiring/steering harness through-hull rigging tube, straightening a bent skeg, and refinishing all the wood. Not too shabby considering a lot of rainy weekends and that I was also planting two separate gardens, painting the garage, and going to my son’s little league games three times a week.
Remembering last year’s launch where a mile from the dock on my way to the yacht club I slammed into some rocks and dinged the prop pretty good, this year I looked at the maps more carefully and kept right to the channels. A nice, easy five mile run with no worries.
Some of the repairs/modifications I made before launching this year that seem to have actually improved things:
Stuff I either didn’t get to in the off-season or which needs fixing:
 The fuel fill on my Wahoo! (quite possibly the original) is shot. Actually a lot of the deck hardware could stand replacing, but the fuel fill in particular is cracked and broken. So I bought a replacement. To remove the original, I accessed and removed the hose clamps that secure it to the fuel fill hose via an access port on the port side. Problem is the fuel fill hose is more or less “melded” onto the fuel fill tube. So coming at it from a different direction, I removed the hose clamps that secure the fuel fill hose to the gas tank itself. But again, that hose connection wouldn’t budge, and no amount of twisting, pulling, or prying made any difference.
So it looks like I’m going to have to cut the hose off (using a box cutter or similar device). Which of course will ruin it, although I’m sure it’s best practice is to replace the hose any time you replace the fuel fill anyway. One last thing I’ll try before cutting is to apply some heat (e.g., wrap the hose in a towel that’s been dipped in boiling water). I’ll report back how that goes.
Added 6/9/12
Well. I finally got the old fuel fill line off. But it was not easy. In fact it was a bitch. I basically had to saw it off bit by bit with a sharp knife (a box cutter it turned out was too short handled to do the job). Cutting the hose through the small five inch entry port was hard enough, with me all the while wondering if metal against metal could cause enough spark to ignite fumes from the tank. But then to further complicate things it turned out that A) fuel fill lines include an embedded spiral of wire that you need to cut through, and, B) as my brother-in-law Russ had predicted, the material of the old fuel fill line had more or less melded over time onto the neck coming from the tank: meaning in fact there was no way I could ever have twisted it off. It had to be cut free. A brute force solution. And man did it fight to maintain that relationship, aided and encouraged by the embedded wire coil, down to the last quarter inch of line. With boats in salt water, nothing is easy. A dremel tool with a cutting wheel probably could have freed the hose in under a minute, but IMO it’d be just too easy to raise sparks or cut too deep.
Lessons Learned: Things I’ll know if and when I next replace a fuel fill:
1. Assume you’ll also have to replace the fuel fill hose, so order that as well.
2. The replacement fuel fill will probably not come with a gasket. So pick up one of those. Also, depending on the shape they’re in, you may want to replace the clamps that secure the fuel fill hose. Inspect everything before ordering your parts.
3. To remove the fill and hose (and assuming that removing the clamps and twisting the hose does not work), cut a vertical slice out of the hose where it covers the neck from the fuel tank. Use a good serrated knife or a small pistol grip saw. Be careful not to cut into the neck. then you can work the hose off. You may also need pliers to pull out pieces of embedded wire you cut exposes.
findre August 9, 2015
findre August 9, 2015
findre August 9, 2015
Lcolon7 June 23, 2015
MikeQ June 24, 2015